Better smartphone document scans: fix shadows, perspective and OCR checks
This article was translated from its source language with AI assistance. Please check technical terms and equations against the original.
A document can look sharp on your phone yet arrive as a PDF with a blurred date or a missing page edge. A useful scan is a complete, readable record rather than a flattering photograph. Improve the lighting and capture angle before relying on automatic correction. Those small changes can save more time than repairing an unreadable scan afterward.
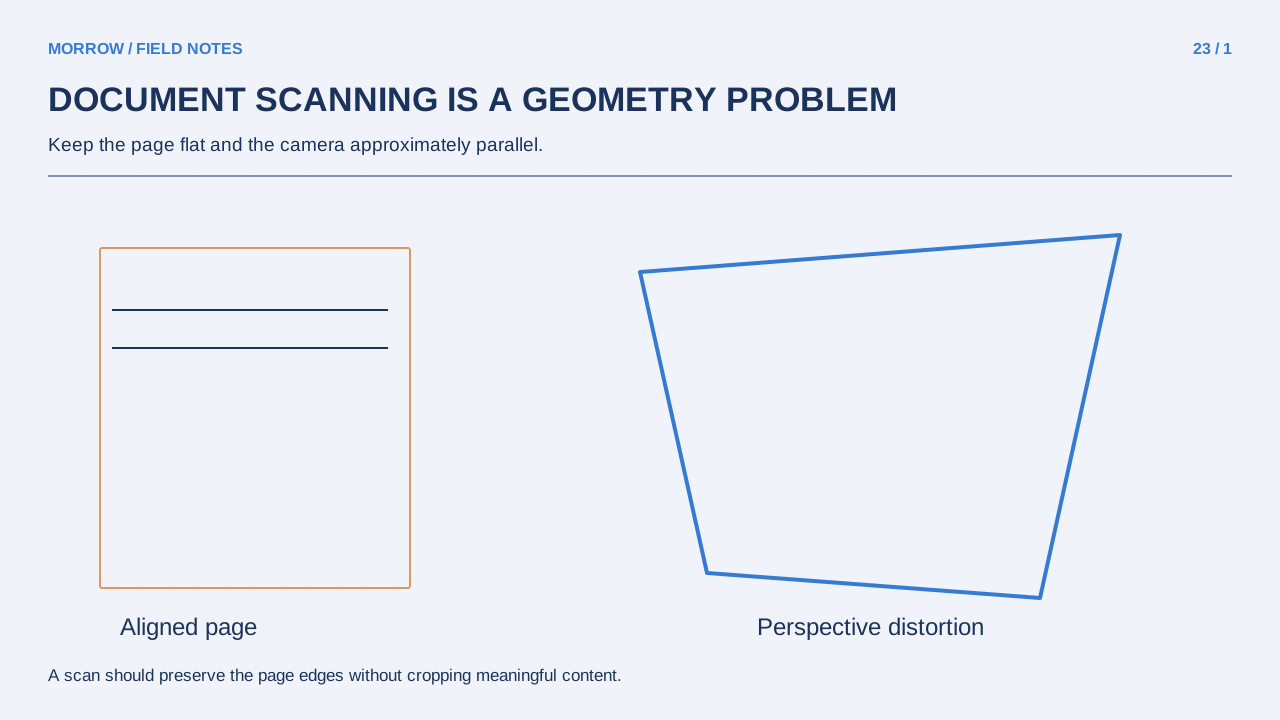
Fix the scene before choosing a filter
Place the paper on a flat surface with a contrasting background. Hold the phone approximately parallel to the page so that the document does not become a narrow-topped trapezoid. Move away from direct glare and check whether your hands or phone cast a shadow across the text. First establish a distance that includes the whole sheet, rather than moving close enough to crop important edges.
Flatten a curled receipt without covering the writing. A fold that falls outside the focus range cannot be repaired simply by increasing contrast. Flash may create a bright patch on reflective surfaces, so compare the actual result with flash on and off. A document's smallest writing is a better quality test than the large heading.
Review the corners after automatic capture
Apple's scanning instructions cover scanning from the attachment menu in Notes and adjusting page corners. Google Drive's guidance describes its mobile document-scanning feature for searchable PDFs. Interfaces vary, but the checks you need remain similar.
- Capture the whole sheet and inspect all four corners.
- Include page numbers, footnotes, stamps and signatures.
- Zoom in and read the smallest letters and numbers.
- Count and order every page in a multi-page document.
- Open the saved PDF separately to inspect the actual output.
Do not assume an app's detected boundary is correct. A dark stamp near an edge or a white sheet on a white desk can make an automatic crop look plausible while excluding content.
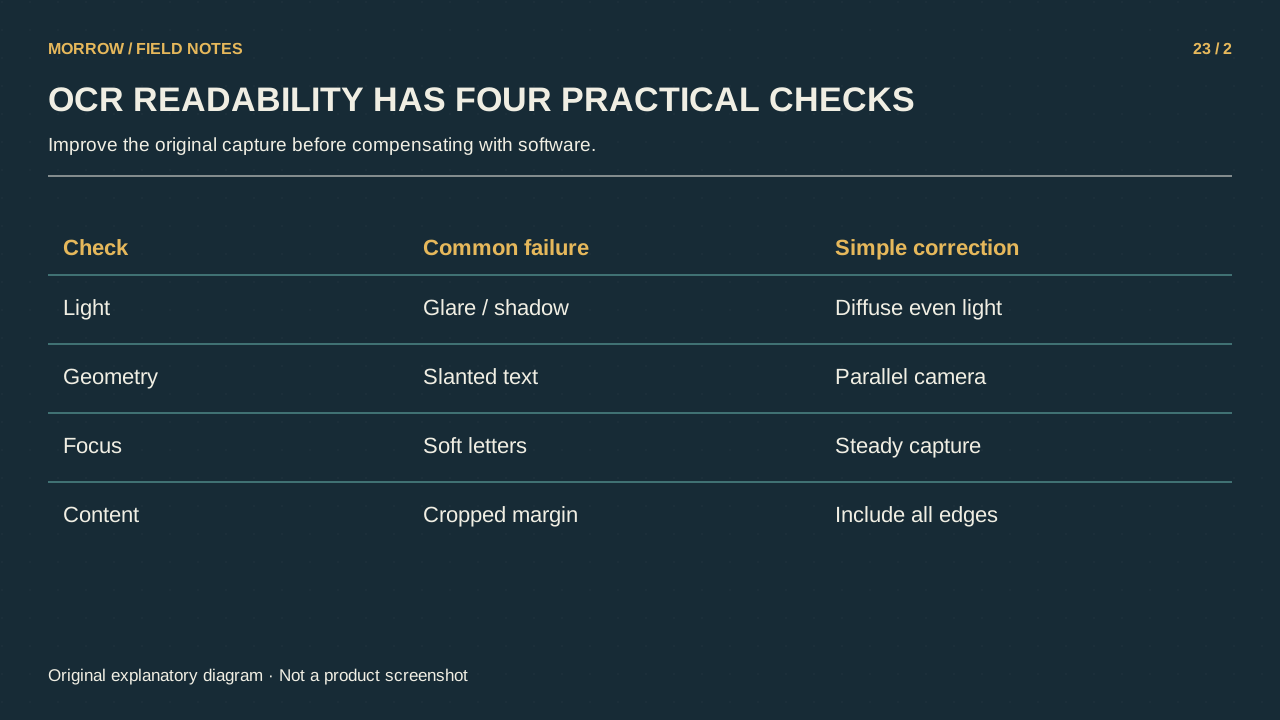
Readable pixels do not guarantee accurate OCR
OCR recognizes text for searching and copying. The Adobe OCR correction guide explains reviewing uncertain words against the scanned image. Important numbers still need your own comparison, even after highlighted suspects have been corrected.
Make a harmless test sheet containing the date “2026-10-13,” the number “1,250.50,” and the code “O01l.” Scan it, copy the recognized text and compare it with the original. Look for O versus zero, lowercase l versus one, decimal marks and minus signs. For real documents, check important values against the original page rather than trusting a successful search result.
Run a short handover test
Open the PDF on a small screen if that is how the recipient will read it. Check the rightmost table column and any faint stamp that a high-contrast filter might remove. Preserve color when it carries meaning in charts or corrections. Putting a photograph inside a PDF does not automatically create accurate text.
If one page is still hard to read, recapture it instead of stacking sharpening and compression operations. Keep source images separate from the final PDF, and record the document name, date and page count. The finished scan should let another person read and verify the complete record without guessing what an impressive-looking filter concealed.
Related practical guides
Original illustrations created to help explain this article.